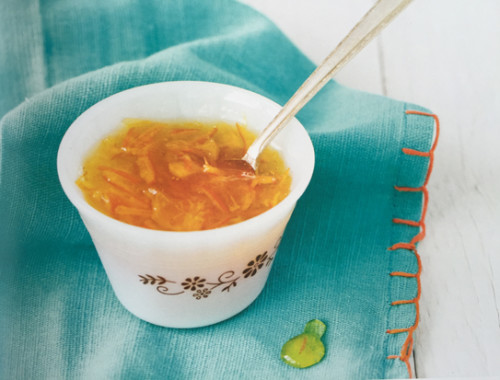
These candied grapefruit peels don’t look quite the way they should. They are supposed to be white-sugar studded and sparkly. But to me, they look like a whole lot like French fries. That’s why I went down to our local burger joint and got one of those little white French-fry baggies to put them in.
I think they look this way because I made them with heavy-grain organic sugar instead of refined white sugar — or even with a finer-grain organic sugar. I learned from my friends Kaela (Local Kitchen) and Kate (Hip Girl’s Guide to Homemaking) that my C & H Organic Sugar is wetter than the stuff with a finer grain. (We have a discussion about preserving with organic v. conventional sugar going on at Kate’s HGGH Facebook page. Maybe you want to join us?) In this case, the extra moisture seemed to create a hard, mostly non-porous shell around each peel, so that when it came time to dredge the peels in sugar for that lovely, sparkly finish, none of the sugar stuck.
Oh, well. It didn’t stop me from eating them. Do you know how many are left? Zero. I am a fanatic for all things grapefruit.
To make my funny little grapefruit fries, I used a method described in the current edition of Edible East Bay. It contains a wonderful interview with Chez Panisse pastry chef Siew-Chinn Chin. (Click on her name and tell me you wouldn’t want to eat anything she offered you — look at that smile!) She offers her own directions for making candied citrus peel and suggestions for using them. I like the idea of “affogato,” in which you pour espresso over a scoop of vanilla ice cream and then top it with chopped, candied citrus peel. Add biscotti and you’re very good to go.
Candied Grapefruit Peel
We eat grapefruit every day at our house — hundreds of grapefruit every year! We saved just three days’ worth of grapefruit halves– tossing them into a baggie in the fridge — to make a big batch of candied peel. If you do this yourself, prepare to hang out near the kitchen for a while, because it takes over an hour just to blanch the grapefruit rind. You’ll want to have another task at your elbow or something to entertain you while all that simmering is going on. While it’s time consuming, the ingredients couldn’t be simpler:
3 large grapefruit, sliced in half and juiced (or eaten!)
3 cups water
6 cups sugar (refined white is probably best, or look for a fine-grain organic sugar like Wholesome)
1. Blanch the grapefruit, following these instructions: Place the grapefruit halves in a saucepan and completely cover them with cold water. Bring to a boil and simmer for 10 minutes. Drain and repeat five or six times. (You need to repeat this so many times to soften the tough peels and leach away most of the bitterness.) After the final blanch, drain the grapefruit halves and let them cool to the point where you can easily handle them.
2. Using a soup spoon, scoop out any remaining flesh most of the pith so you are left with “cups” of peel. (You want to leave a little bit of pith because it will what absorb the sugar syrup.) Cut the grapefruit halves into strips about 1/4″ wide (leave them long or cut them in half, whatever you like).
3. Combine the water and sugar in a large saucepan and slowly bring the mixture to a boil, occasionally stirring to dissolve the sugar. Add the sliced grapefruit and return the mixture to a boil, then reduce to a simmer.
To plate or not to plate? At this point in Siew-Chinn’s instructions, she advocates putting a sheet of parchment paper over the simmering mixture and laying a plate on top of that to keep the grapefruit peels submerged. I bet if I were a pastry chef at Chez Panisse, I would know how to make that work, but I tried it and ended up with a big hot mess. One of my plates was too small, so the grapefruit peels smooshed out from the edges of it. The other was large enough, but I couldn’t tell what the heck was going on under there. I gave up on the plate idea and everything still turned out okay. After the peels had simmered for a bit, they sunk of their own accord into the syrupy drink.
4. Simmer the grapefruit for about 30 minutes, or until the peels are translucent and tender. The syrup should be the color of straw, not too dark or caramelized. (I had hoped I might be able to save the syrup to use it for something else, but unlike the peels themselves, the syrup was too bitter for my taste. I love bitter citrus, but the flavor of this syrup was somehow not right.)
5. Remove the peels from the syrup and place them on a wire rack to dry, placing something — a pan or a towel — under the rack to catch drips. You might want to do better than I did and think ahead about your wire racks. You will need quite a lot of space to dry these guys! If I had been thinking straight, I would have pulled the wire racks out of my oven and used those, but I was running around with my head unscrewed and all I could think to do was pull an elfa organizer drawer out of my closet, turn it over, and use that. It worked, but I had to be pretty meticulous about cleaning up later, lest I end up with a year’s worth of sticky socks.
6. Let the peels air dry for one or two days. Ideally, they will be a tad sticky but not wet. (Here’s where I think you’ll get a different result from mine if you use a finer-grain sugar. As I mentioned, my peels dried with a rather hard casing on the outside, but stayed wet on the inside for a couple of days.) After the peels are sufficiently dry, dredge them in sugar, coating them as thoroughly as you can.
Siew-Chinn recommends storing them in the fridge, in an airtight container or zip-lock bag. Mine hardly made it that far. I preferred to transfer them directly to my mouth.