Last week I drove from Fairfax down to Watsonville (six hours round trip) in search of the elusive tayberry. I found one scraggly patch of tays at an organic U-Pick farm — not enough for even one batch of jam. Rather than send me away empty handed, however, the farmer directed me to one of her neighbors, where I was able to pick nine luscious pounds of two other blackberry varieties: boysenberries and olallieberries. It was fine consolation.
When I returned home from all that driving and picking, I was so tired that I was literally swaying on my feet. I wanted to flop right over, but the boysenberries were fat, juicy, and warm from the long trip home in the car. They weren’t going to wait another day. (The oallies generously agreed to spend one night in the fridge.)
I calculated my weights and measures (three times, just to be sure) then put the simple ingredients into a big glass bowl. I was so exhausted that I felt like I’d never made jam before. I stood there staring at the gorgeous berries soaking in sugar and lemon juice, blinking hard, thinking “I must be forgetting something. This is too easy.”
But it is that easy and, man, I do think these blackberry jams are the best of all.
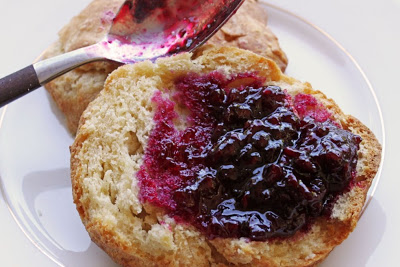
These are big, sweet boyz, busting with colors from maroon to deepest purple-black. Boysenberries are a triple cross — a mix of a red raspberry, a common blackberry, and a loganberry. I’m infatuated with them right now because I discovered that they were bred and born right here in California in the early twentieth century, on the farm of a man named Rudolph Boysen. They very nearly didn’t survive after Boysen’s farm was sold, but were saved and nurtured to berry fame by Walter Knott, of Knott’s Berry Farm. America’s first theme park was built on boysenberries and chicken dinners.
When it comes to blackberry-type jams, I use less sugar than many. With this recipe, you’ll really taste the berries and you’ll get a little tart with your sweet. (Oh, and if you don’t have five pounds of berries — cuz, come on, that’s a lot — but you do have three, you can click on over and use the basic recipe for Tayberry Jam. Same diff.)
Boysenberry Jam
5 pounds boysenberries
4 1/2 cups sugar
2 tablespoons lemon juice
1. Sterilize your jars and put 5 teaspoons on a plate in the freezer, to test your jam for doneness later.
2. Set aside approximately 1/4 of the berries.
3. Combine the rest of the ingredients (remaining berries, sugar, and lemon juice) in a large bowl and set them aside to macerate a while — 30 minutes to an hour at least. (Overnight in the fridge would be great, too.) You’ll know they’re ready when the berries have started to release their juice and the sugar has begun to dissolve.
4. Put the mixture into your jam pot over medium heat. Stir gently until the sugar has completely dissolved.
5. Turn up the heat and bring the mixture to a boil, stirring only as needed to prevent sticking or burning.
6. After the mixture thickens a bit, add the remaining berries. I added mine at about 15 minutes. This late addition of the berries helps your jam to have a nice texture in the end.
7. Boil the jam to the setting point, using a large, shallow, stainless-steel spoon to skim the stiff foam off the top as it cooks. This is a big batch, so it will take a while to cook. I started testing my jam for doneness at about 30 minutes and considered the jam finished at around 35 minutes. (Keep in mind that lots of factors can affect your cooking time; it may be very different for you, so be sure to watch the mixture and test it.) I prefer a faster cooking time than this and, if I were less tired, I might have split the berries into two batches — but honestly, I don’t think the flavor suffered. It’s really good.
To test your jam for doneness: Remove the pan from the heat. Use one of your frozen spoons to scoop up a little bit of jam — not a whole spoonful. Return the spoon to the freezer and wait 3 minutes. Retrieve the spoon and hold it vertically. If the mixture runs very slowly or not at all, it’s done. (Actually, if it truly doesn’t run at all — if it just sits tight and stares back at you — it’s probably overdone and you’ll have an overly firm or rubbery set. You want it to move at least a little bit on the spoon.) Alternately, give the mixture a little push with your finger. If you see creases or wrinkles, it’s done.
8. Take care of any final skimming and pour or ladle the hot jam into your sterilized jars. Wipe the jar rims and secure the lids. I processed mine for 5 minutes in a hot-water bath, which is appropriate for fruit at my elevation.
Makes about 8 half-pint jars.


